Showing posts with label dutch braids. Show all posts

Monday, July 23, 2012

Dutch Crown

I was on Pinterest recently and came across this amazing hairstyle.  We are calling it the Dutch Crown and the picture is below. 
You can find the original link here which will give you a much larger view of the picture and instructions.
This is our attempt at the hairstyle and I really like how it turned out. 
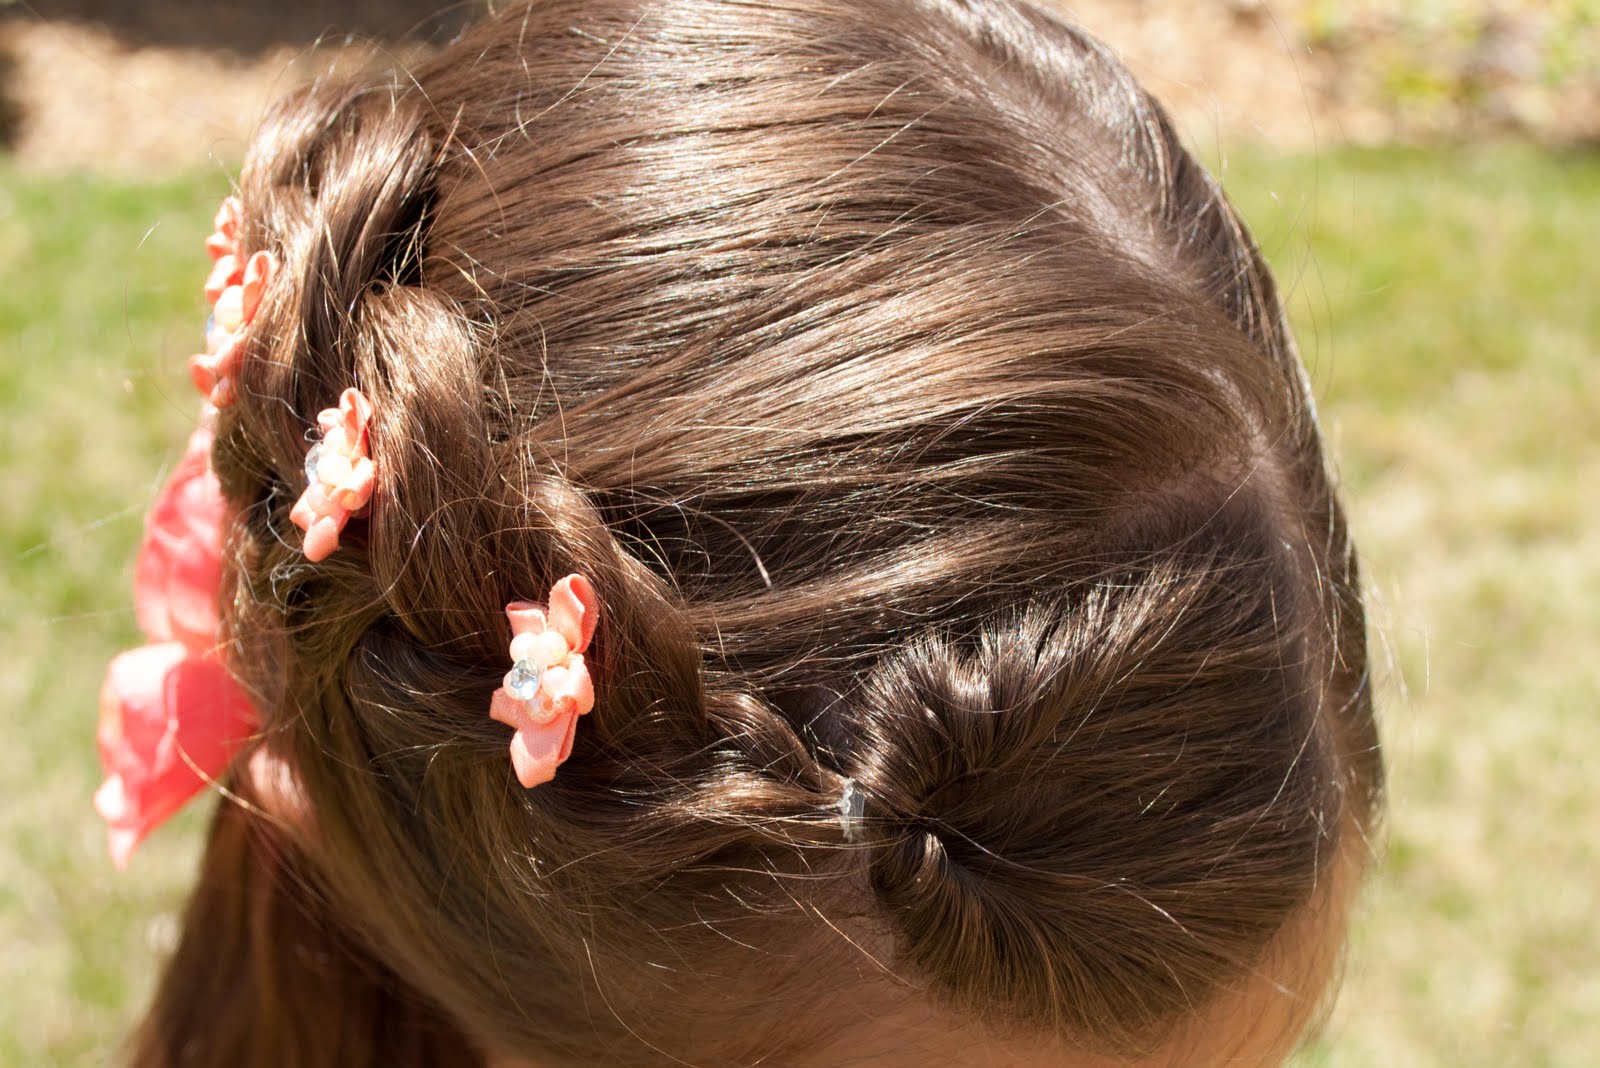
The length of my princess's hair had it her braid ending directly above her right ear and it turned out nicely.
By starting the Dutch Braid down at the bottom, it wrapped around the head more evenly.  
 A very simple and beautiful hairstyle!

Friday, May 11, 2012

Friday's Films: French 4-Strand & French 5-Strand

We've had more than a few requests for these videos so I'm finally getting them up for you. 
First of all we have the French 4-Strand:
 Hopefully that makes sense for you and will help.
Here's a picture of the finished French 4-Strand.  This is cool because it's half a French Braid and half a Dutch Braid!
You can see that this side is the "French" half.
And this side is the "Dutch" half.
We just finished it off with a 4-Strand Braid and secured it with an elastic. 
Next we have the French 5-Strand:
The fingering it definitely a bit more tricky as you plait this braid but it is one that gets much better after a couple practices.
 
Here's a picture of one of our finished French 5-Strand hairstyles and you can find the original post for this one here.
There is also this hairstyle that we did a couple weeks ago and it's a diagonal French 5-Strand.  That original post is here.

Wednesday, March 21, 2012

Dance Do

I've done several dance hair styles before but this one has a bit of a different twist on it so I thought I would post just in case any of you have little dancers out there and are stumped on hairstyle ideas.  Make sure you begin this style with wet hair for better hold. 
I started by sectioning out the bang area on the front of head and creating a Dutch Braid.  (A Dutch Braid is basically a French Braid but you have your plates go underneath instead of over the top.)
I did not have the Dutch Braid go all the way down to the ear but rather just to the end of the bang line and then I just finished plating the hair I had gathered into a Regular 3-Strand Braid. 
I secured that braid at the end with an elastic and then set it aside for a minute. 
Pull the remaining hair tightly back into a ponytail.  You can make the ponytail high or low depending on the look you are going for.  We've place this one right over the crown of the head.
Now go ahead and create a Barrel Roll from the hair used in your ponytail.  You can find a video tutorial for the Barrel Roll here.
Once your Barrel Roll is completed you can bring your original braid down around the back of the bun and tuck the ends underneath.  Use bobby pins to secure it into place and then give it a good spray with hairspray to ensure hold throughout the dance performance.  At this point you can spray the hairstyle with craft spray glitter as well if you want that sparkly look.  We usually do this but did not have any glitter on hand at this time.  Add some fun hair accessories if you like as well. 
This hairstyle holds very tightly and is perfect for keeping that hair out of the face while your princess is dancing! 

Tuesday, April 26, 2011

Railroad Tracks

Begin by parting the hair in half from ear to ear.  Tie the bottom half into an elastic to get it out of the way.
 
 Now start over by the left ear and start forming a Dutch Braid.
 
 I have only added hair to the top/right side of my braid but you can do a regular Dutch Braid and add hair into both sides if you like. 
When you have gathered all of the hair from the top half of the head, finish braiding the hair next to the right ear.  Take the elastic out of the bottom section of hair and repeat the steps.
 
You should end up with to braids next to the right ear.  Go ahead and cross one braid over the other and then pull the bottoms of the braids back up to the head. 
 Bobby pin them into place and flip the ends of the hair out.  It helps to wet the ends and then curl them over your fingers.
  Now you have your railroad tracks!

Saturday, April 16, 2011

Loosey Goosey

I saw this hairstyle over at Princess Hairstyles and instantly fell in love with it.  It's basically a loose Dutch Braid. 
 Start by creating a part from the left half of the bang line that goes diagonally all the way down to the neck.  Clip the left half of that part off to the side to keep it out of the way because you will be working with the right side. 
 
I started by creating a small Pull-Through at the top of the head first but this is totally optional. 
Begin your Dutch Braid (Inverted Braid) and make sure that your plates aren't super tight as your work your way down the head.  You may also want to add in larger sections of hair than you normally would as you plate it.  When you've added all the hair in, plate the braid a few more times and secure it with a loose elastic. 
Now, starting at the bottom you will want to pull at the plates of the braid to loosen them up.  There is supposed to be a disheveled look to the braid so don't worry if it's not looking perfect. 
 Once you've pulled at the plates and get it looking the way you like, you can unclip the left side of your part.  Comb that hair over to the right side where your braid is and secure all of it together with an elastic.  Brush any braid underneath the elastic out so that you are left with a simple side-ponytail.  
 Add a hair clip to conceal the elastic.  We've also added some flowered hair pins into the plate of the Dutch Braid for a fancy look for church.   

Monday, February 14, 2011

X's & O's

Happy Valentine's Day everyone!  This is our final post for the Valentine's hairstyles and it's a fun one.  Today is all about hugs and kisses so this is our "X's & O's" style. 
 
Start with a small section up front where you will create a Pull-Through that goes off to the right side.  Part the rest of the hair right down the middle and clip the left side out of the way for a minute.  Pull all of the hair on the right side of the part into a ponytail.  (Make sure to include your Pull-Through from the front.) 
 Grab a bun mold and pull it over the ponytail.  (Bun molds can be found at Sally Beauty Supply or can be made by cutting the toe out of a sock and rolling it over itself.)  Once your mold is in place you will spread the ponytail evenly around it and then slip another elastic over the hair and the mold to hold it in place. 
 Divide the excess hair from the bun into two sections and create a braid out of each.  Wrap the braids around the base of the bun and bobby pin them into place.  Now your "O" is finished. 
 Move over to the left side and part the hair evenly down the middle of the section and then again evenly across the section so that you now have 4 squares.  Leave the top-right square alone and clip the other 3 squares into their own temporary clip to keep them out of the way.  
   Begin a Dutch Braid in the top-right square and have it curve down into the inside corner.  Gather all the hair from that square and then plate the braid again 3 times without adding in new hair.  Unclip the bottom-left square and finish up your Dutch Braid.  Braid all the way to the end of the hair and secure it with an elastic. 
 Now move up to the top-left square and Dutch Braid that until all the hair has been gathered.  Plate it 3 more times OVER the previous braid.  Now unclip your last bottom-right square and finish up your Dutch Braid.    Braid all the way to the end of the hair and secure it with an elastic.
  Now fold both of the long braids up on top of themselves and secure with another elastic.  Let the ends of the hair just flip over naturally and add some ribbons to finish your "X" off. 
 Add a ribbon to the "O" as well and you're all done!

HAPPY VALENTINE'S DAY FROM ALL OF US TO YOU!
Here is our princess which you all know so well and she is 7 years old.
This is our oldest son who is 5 years old.
This is our middle son who is 3 years old.
This is our baby who is 14 months old. 

Monday, January 31, 2011

Double Corset Lacing

I love the look of this one but make sure you have a good 30+ minutes in the morning to spare.  :) 
 
Begin by parting the hair into 3 equal parallel sections.  Create a Dutch Braid out of each of the sections and make sure to braid all the way to the end of the hair.  Now grab some of your favorite ribbon and measure out how much you will need by mimicking the weaving pattern quickly.  It's always best to overestimate a bit.  Make sure you have enough ribbon to cut the same length for your second side as well. 
 Now grab a plastic yarn needle and thread it with the ribbon.  Find the very center of your ribbon and make sure it's placed right at the top of the head - in between two of your Dutch Braids. 
 Start with one half of the ribbon and stitch it into one of the plates on your Dutch Braid.  Pull it through so that it lies flat and then take it across and stitch it through a plate on the other Dutch Braid. 
Continue doing this all the way down to the neck and then go back up and grab the other half of your ribbon.  Make sure your stitches on the second half of the ribbon are even with those from the first half.  (Just on the opposite side.)  When you get down to the neckline you can tie the two ends of the ribbon together into a bow. 
Now repeat the steps for your second side of corset lacing.  When you are all finished, you can either combine the three braids into one elastic like we've done here or leave them each hanging free. 
This is a great one to use for Valentine's Day and use pink or red ribbons!

Wednesday, January 26, 2011

Cross My Heart

It's the time of year where we start thinking about all that lovey-dovey stuff and everywhere you turn you see hearts.  :)  I'm going to be posting a few fun Valentine's hairstyles here and there so keep your eyes peeled!  Here's one that I like to call "Cross My Heart" and the name sounds romantic so I'm posting it.  :)
Start by parting the hair horizontally into 3 even sections.  Clip the two side sections out of the way and create a Dutch braid out of the middle section.  Braid it all the way to the bottom of the hair and secure it with an elastic. 
 Unclip your right section of hair and twist the whole thing in toward the braid.  (I have twisted away from the braid here just to show you that option as well if you like it better.) 
 Have your princess hold the twist while you move over to the left section and twist that in toward the braid also. 
Now take your two twists and cross them over the top of the braid and then around the back. 
 Keep wrapping them around the braid until you get to the bottom of your twists.  Now secure the twists and the braid together at the bottom with an elastic.  Hide the elastic with a hair clip to finish it off.